Category: Costumes


Shirt to Backless Choli Conversion

For practice and performances (especially in the tribal style) you can never have too many backless choli tops.  These tops have a solid front and an open back, with a band around the bottom that ties at the back of the rib cage, and straps at the shoulders that tie behind the neck.  The good news is that these are actually fairly easy to make from an existing top!  This tutorial will walk you through the simplest method (I’ll add pictures when I make another one of these tops).  If you have more experience sewing, you can also make modifications to further customize your top (such as changing the neckline, sleeves, adding darts, etc).

These tops are great to make from simple t-shirts for practice, and fancier fabric (such as velvet) for performance.  Keep an eye out at yard sales or your local thrift store and you should find lots of tops that would make great conversion projects!

Materials:

  • Stretchy top that fits snugly (it shouldn’t be baggy, but it shouldn’t be super tight either – you should be able to move around without strain on the garment), has a neckline and sleeves that you like, and is long enough to provide extra fabric to make straps.  (It should come down at least to your belly button, and it would be preferable if it came down to your hip bones or lower.)  If your shirt is not long enough, you will need to find other fabric to make the straps.
  • Scissors
  • Pins
  • Sewing Machine (that can do a zig zag stitch).
  • Thread
  • Ruler or Hem Gauge (optional, you’ll want one if you aren’t very comfortable with visually judging the size of things)
  • Safety pin

The Process:

  • Step 1: Mark and cut the new bottom of the shirt.
    • Put on your top and mark with a pin where the rib cage band should be (you’ll want this solidly under your bust, so that the band will be secure and the top won’t ride up.)
    • Take the top off, lay it out nice and straight, and mark a horizontal line half an inch down from where you pinned.
    • Cut along your line, save the lower half of the shirt.
  • Step 2: Mark and cut the back opening.
    • Put the shirt back on.  Mark with a pin (on one side) at the bottom edge of the shirt, where you’d like the back opening to be.  (Some people prefer a narrow opening in the back, while others prefer it wide.)
    • If you want the opening to be narrow, also mark (on the same side) on the collar where the back opening should be.  (For a standard or wide opening, we will always have the opening start where the shoulder seams are, so there is no need to mark the top edge.)
    • Take the top off, and match up (and pin) the following points: shoulder seams at collar, side seams at arm pit, sleeve seams along back of the arm hole, side seams down to the bottom edge of the top.
    • Lay the top out so that there is a fold at the center back and your pinned marks from before are facing up so you can see them.  (You will cut through both sides of the back at the same time so that they match.)
    • Mark a line starting half an inch (toward the center) from your lower mark to half an inch (toward the center) from your upper mark or the shoulder seam at the collar.
    • Cut through both layers along this line.
  • Step 3: Hem the back side edges.
    • Fold the edges you just cut under half an inch, pin them in place, and stitch them down using a zig zag stitch (this will allow them to retain some extra stretch without popping stitches).
    • You can use a straight stitch for looks, if the top is not so snug that you are concerned about these edges needing to stretch much.
  • Step 4: Measure and cut straps.
    • Grab the bottom portion of the shirt that you retained from Step 1.
    • Mark three 3 inch wide bands across the shirt.
    • Cut these bands from the shirt.
    • Cut one of them on the side seams (so that you have 2 even sized shorter strips).
    • Cut the other two on one of the side seams (so that you have 2 even sized long strips).
  • Step 5: Assemble rib cage band.
    • Take your two long bands and sew them together on one of the short ends (so that you have one very long strip).
  • Step 6: Attach rib cage band.
    • With the right sides facing one another, match the center of the long strip to the center front of the bottom edge of the top and pin.
    • Pin the strip to the shirt along the bottom edge.
    • Sew with a straight stitch (you don’t want this to stretch much, as you want to keep the shirt hem firmly down under your bust).  Leave a half inch seam allowance.
    • Stitch this seam twice if you are concerned about the strain it may be under.
    • Start and stop stitching at the back side edges (don’t sew out onto the strap itself beyond the edges of the shirt yet).
    • Starting at the center front, fold the band over toward the wrong side of the top.  Tuck in half an inch of the band, so that it seals up the seam you just made to attach the band to the shirt.  Pin in place.
    • Continue to fold over the band and pin in place along the bottom of the shirt.
    • Also fold, tuck in the seam allowance, and pin the rest of the straps on either side of the shirt.
    • Stitch again along the full length of the straps to close them up (twice for extra strength if needed).
    • Tuck the ends in and stitch  to seal the ends on each side.
  • Step 7: Assemble shoulder ties.
    • Get the two shorter strips from Step 4.  Repeat these steps for each one.
    • Fold it in half down the length of the pieces (right sides together).
    • Pin the long edges together.
    • Stitch with a straight stitch down the long edges to make two tubes.
    • Turn the tubes right side out (pin a safety pin to one end of the tube, and then feed it (with the rest of the tube following it) back through the tube and out the other end).
    • Tuck the short ends in (on one end of the tube) and stitch closed.
  • Step 8: Attach shoulder ties.
    • Take the open end of one of your tubes and pin it in place at the top edge of the back opening.
    • Stitch securely by sewing over the area multiple times.
    • Repeat on opposite side.
  • Step 9: Try out your new top!
    • It’s often easiest to tie the rib cage straps first to help hold the top up, then the shoulder straps, then adjust the rib cage again if needed.
    • Once the shoulder straps are adjusted, you may want to leave them tied and just pull them over your head for future wearings.

Christmas Show Preparations

image

image

image

image

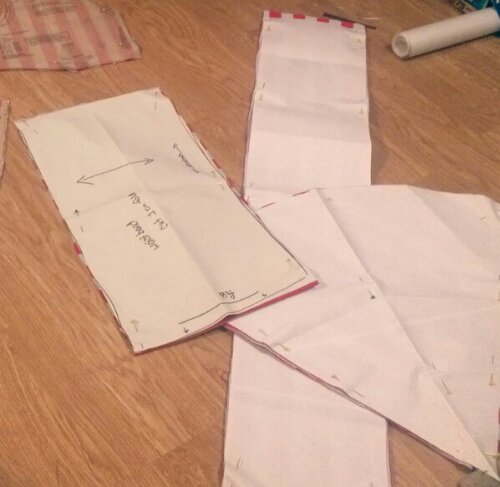
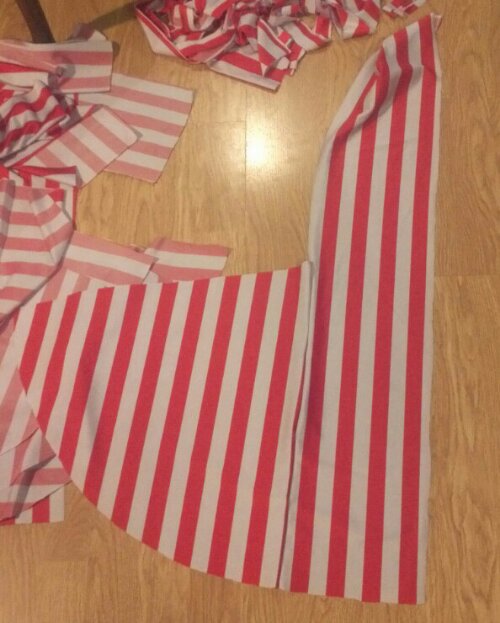
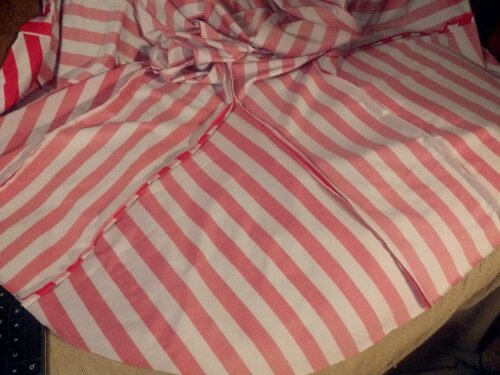
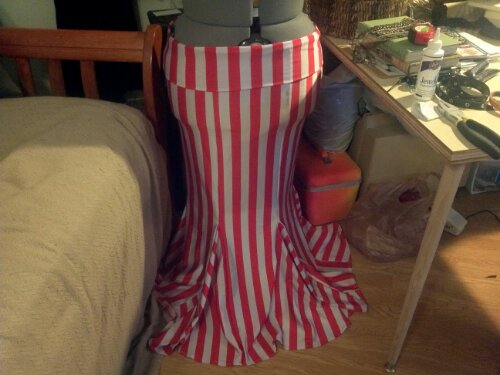
We have the monthly show at Satchel’s the Tuesday after Christmas, and we’re going to have some fun with it.  We’ll pick Christmas-y music for one set (at least), and I’m working on festive outfits.  For my own part, I’m going to be a peppermint candy cane, with a skirt and top in red and white stripes!  I made the skirt tonight (start to finish, about 2 hours), and have a few photos to share.  This style of skirt is super easy – 6 rectangles, 6 quarter circles, and one more rectangle for the wide waistband (mine is a foldover style, I like to be able to adjust them for a higher or lower waist depending on how I feel on a given day).

You should use stretch fabric – 4 way is ideal, but 2 way is fine as long as it stretches horizontally to give you room for your tush.  The rectangles should measure from where you want the bottom of the waistband to sit, to the floor, plus an inch for seam allowances.  Their width should be approximatey your hip measurement (take a little off if you want the skirt more snug) divided by 6, plus an inch for seam allowances.  The radius of the quarter circles should be the measurement from your knee to the floor.  The waistband rectangle should be twice as wide as you want the band to be, plus an inch for seam allowances, and as long as your hip measurement, plus an inch for seam allowances.

Sew one quarter circle to each rectangle to get 6 bizarre, sort of L shaped pieces.  Then sew those together such that there is a quarter circle in between each long rectangle.  Then sew the short ends of the waistband together, and fold it in half lengthwise (right side out) and pin the open edges together so that they don’t shift.  Pin the waistband around the top edge of the skirt and sew it down (a zig zag stitch is probably good for this part, since it will stretch more than the other seams will).  From there, trim up your seam allowances if you need to, toss a half inch hem on the bottom, and you’re good to go!

Cat Costumes!

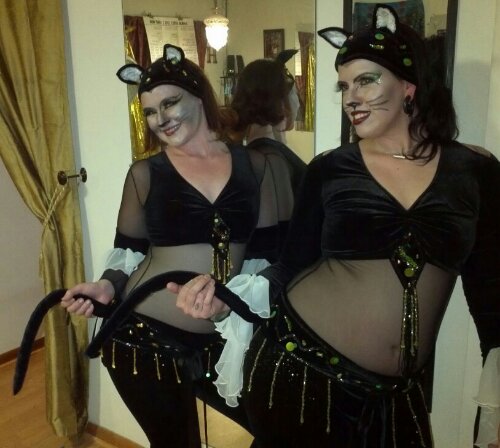
We have the cat costumes for the Halloween show *mostly* finished, so we did a makeup test and rehearsal.  And here are some resulting photos!

image

image

image

We’re planning something fun for the Halloween show at Satchel’s this year! (Oct 25)  There’s going to be a little bit of everything: zombies, ghosts, skeletons, and spooky black cats.

I’ll post more about the other characters as we progress into the month of October, but today we’re going to talk about the ghosts!  The level 1 students will be dancing as ghosts and skeletons, and we recently finished the ghost costume prototype.

The students will wear white pants and tops (and skirts, scarves, or other accessories if they have them), and we’ll be providing some additional accessories to spookify the whole thing.  The add-ons consist of a belt, shrug, wrist danglies, and a headband – all made out of ribbons, various types of yarn, and shredded sheer fabric.

The makeup is fairly simple – a white base with black ovals over the eyes and mouth.

Without further ado – here are some pictures!


Costuming Guidelines

The following is a handout we provide to students with guidelines on costuming for performing with the class.

For more information about our belly dance classes, please check out the class info page.

Before we begin, I should note that we use the word traditional loosely.  Tribal belly dance has not been around terribly long – when we say that something is part of traditional tribal costuming, we mean that it is part of the norms established for recently invented tribal belly dance.  We do not mean that it is part of any particular culture’s traditional dance costuming.  That said, some items do hail originally from other cultures (and some don’t), there is much to be learned about these traditions, and it’s definitely worth doing some research.

COSTUMING GUIDELINES

Guidelines for costuming for casual performances (such as Satchels) and full performances (such as art fairs or more public performances).  See the ‘Costume Pieces Definitions / Explanations’ for further information on each costuming piece and further guidelines.

SATCHELS / CASUAL PERFORMANCE GUIDELINES:

  • CHOLI OR HALF TOP – Either Choli / Half top or Halter / Dance Bra (or Both) Required
  • HALTER OR DANCE BRA – Either Choli / Half top or Halter / Dance Bra (or Both) Required
  • BELLY COVER – Optional
  • HIP SCARVES – at least one Required
  • TASSEL BELT – Preferred
  • OTHER HIP DECORATION – Optional
  • SKIRT(S) – Either Long Full Skirt or Full Pants (or Both) Required
  • PANTS – Ether Long Full Skirt or Full Pants (or Both) Required
  • SHOES – Optional, but a good idea due to the location
  • JEWELRY – Required
  • MAKEUP – Required
  • HAIR DECORATION – Required
  • COVERUP – Required

FULL PERFORMANCE GUIDELINES:

  • CHOLI OR HALF TOP – Required
  • HALTER OR DANCE BRA – Optional unless otherwise noted
  • BELLY COVER – Optional unless otherwise noted
  • HIP SCARVES – at least one Required
  • TASSEL BELT – Required
  • OTHER HIP DECORATION – Optional
  • SKIRT(S) – Required
  • PANTS – Required
  • SHOES – Optional
  • JEWELRY – Required
  • MAKEUP – Required
  • HAIR DECORATION – Required
  • COVERUP – Required

COSTUME PIECES DEFINITIONS/EXPLANATIONS:

CHOLI OR HALF TOP – Shirt that cuts off around the ribcage area. Cholis are the traditional top for tribal bellydance.  The hard line creates emphasizes upper body isolation and movement.

HALTER OR DANCE BRA – Decorative halter or bra style top (often w/ coins, shells, mirrors, beads, etc.) specifically made for dancing.  These can (depending on cut and circumstance) be worn alone or over a choli or half top, though in tribal bellydance the more traditional way to wear them is over a choli.

BELLY COVER – form fitting shirt, leotard, or body stocking worn under the choli (optional in most circumstances).  MUST be form fitting to allow for visibility of undulations, etc. This can be opaque, sheer, lace, net, etc. It should coordinate with the costume and be contrasting in color with the top and bottom (or scarves) so lines are still made for visibility of isolations.

HIP SCARVE(S) – at least one scarf – fringed, beaded, coined, or otherwise – in colors that stand out from your skirt (and belly cover if worn) – these create lines that allow your hipwork to be more visible and can be tied to create more bulk at the hips which create shape and also make hipwork more visible.

TASSEL BELT – Belt or scarf with (usually yarn) tassels. Traditional tribal bellydance attire.  Tassels swing, bounce, and otherwise emphasize hip movement.

OTHER HIP DECORATION – coin belts, chain belts, etc.  – Add movement, sound, and adornment.

SKIRT(S) – In most cases full, long skirts – broomstick skirts, circle skirts, 10 yard skirts, 25 yard skirts can all work.  10 and 25 yard skirts are the traditional choices.  Panel skirts and shorter skirts can be layered over other skirts and very full pantaloons – especially with a lot of scarves and hip adornment, but by themselves they do not create a full enough (or covered enough) look.  Skirts should in most cases be worn with pants.  The exceptions would be in extremely hot and/or casual performances. In these circumstances especially, the skirt should be full and long and you should still be wearing at least hotpants underneath.  Skirts (worn over pants) can be tucked up in various ways to create different looks and shapes (frequently done in traditional tribal bellydance).

PANTS – Pants should with very few exceptions be VERY full.  Pantaloons (full pantaloons), flare pants, and palazzo pants are the primary acceptable choices.  Pantaloons are the only pants worn in traditional tribal bellydance.  The only time smaller pants are acceptable is under a skirt worn down.  In that case, less full pantaloons, jazz pants, etc are acceptable.

SHOES – Shoes (usually optional) should be flexible enough for your feet to move well.  The soles should allow you to turn.  Shoes made specifically for dance are usually the best choices: ballet shoes, jazz shoes, Hermes sandals, lyrical shoes, etc. No matter what shoes you choose – make sure that you have practiced in the shoes and are comfortable dancing in them.

JEWELRY – At least some jewelry should be worn at ALL performances.  A good guideline would be at least a necklace, a bracelet on each arm, and a ring on each hand.  This is a MINIMUM.  The tribal look is not understated.

MAKEUP – Makeup should be worn at ALL performances.  This should be performance makeup, which is much more than you would wear for a night out.  A face without makeup or minimal makeup will be washed out on stage and in pictures and its facial expression will disappear.  We do not require any specific makeup palate or decorations at this time.  You may use decorative markings if you so choose.  If you do choose to use any decorative markings, it is a good idea to research and be sure you know if they are purely decorative or if they have meaning in certain cultures and decide if you want to portray those meanings.

HAIR DECORATION – At least some hair decoration should be worn.  This can be as small as a decorative hair clip and as extensive as a headdress full of flowers and hairfalls and whatever else you can imagine.  Traditional tribal headdress is a turban. We have never done turbans in our tribe.

COVERUP – Outer garment worn whenever not actually on stage — should at least cover belly (even if you are wearing a belly cover with your costume).  In more formal situations, the more of the costume that can be covered up, the better (at least upper and particularly decorated portions of the costume – bra should be as covered as possible if you are wearing a costume bra).  Options can include scarves tied around over the shoulder (especially for more casual performances or performances in very hot weather), veils, caps, coats, caftans, etc.  The coverup should be attractive and present a nice overall appearance with your costume, as this is what the public will see any time you are not on stage.  The more formal the performance, the more your cover up should cover (full caftans are popular for this type of event).


Preparing to Vend

A month or so ago, we had our very first vending experience.  It was small scale, we had a table at a local workshop and hafla here in Gainesville.  In deciding what to bring, we looked at the things that we make for ourselves that usually garner the most interest from the other gals in our regular weekly belly dance classes.  We opted for items that are fairly quick to make, and use simple materials – tassels and floofy pants.  Of course we also took the opportunity to clean out the dance closet a bit, and brought several used items, appropriately marked down.

Anywho, the main purpose of this post is to share a couple of fun pictures from one of our work days preparing items to bring.

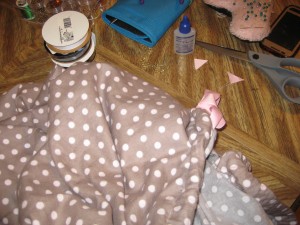
Some really cute fabric for pantaloons.

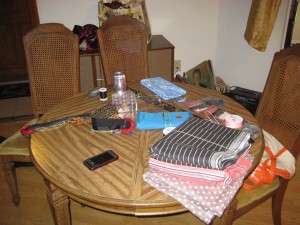
The main work table.

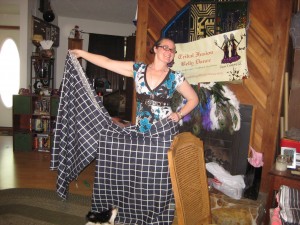
Modeling one pair of pants (before the drawstrings go in).

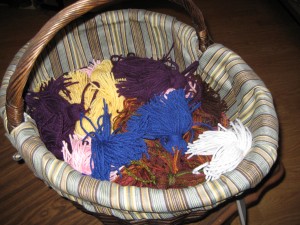
And last but not least, the tassel basket.

The tassel basket lives in my craft room now, and I try to make and add new tassels periodically so that it’s always ready.  These tassels have a big loop on the top that can slide over a simple braided belt (or any other kind of narrow belt) so that you can easily mix and match tassels to go with the rest of your outfit and wear the belt wherever looks best amidst your other scarves/belts/etc.  We call it BYOB (Build Your Own Belt) – hehe.

We’re going to try out using these in our semi-private belly dance classes to help students (especially new students) see the movement of their hips better, without the noise of coin scarves.  It seems like braided belt will make a nice, straight horizontal line that the dancer can watch in the mirror and see the angle of their hips more clearly than with most coin or fringe scarves.  The tassels are very lightweight too, so they should move easily and help a new dancer with a smaller range of motion to see the tassel responding to the movement where a heavier scarf might not move much.  If this experiment works well, I’ll be back later to tell you all about it!